「TIL」在 Deta Space 中部署 Discord Bot
discohook 在 2023-04-16 更新了版本,部分接口发生了变更。新版本已无需再手动拷贝添加命令 ID 到命令装饰器中,请悉知。
今天和朋友在 Discord 频道里聊天玩 ChatGPT 机器人,突然想要试试自己写一个 Discord Bot,因为最近一直在使用 Deta Space,并且之前也发现了一个可以在 Serverless 平台上使用的 Discord Bot 框架
discohook,所以尝试了一下在 Deta Space 上部署一个 Discord Bot 应用同时做一个简单的记录。开发环境
首先创建一个 Deta 项目,在此之前需要先安装好 Space CLI,可以参考这篇文档安装并登录
❯ mkdir discord-bot
❯ cd discord-bot
❯ space new

? What is your project's name? > discord-bot

~ No Spacefile found, trying to auto-detect configuration ...
~ Empty directory detected, creating discord-bot from scratch ...
✓ Project discord-bot created successfully!
操作后会在当前目录中自动创建一个空的
Spacefile 应用配置文件,这里可以暂时先放一放,后面再来进行配置。然后需要创建 Python 的开发环境并且安装 discohook 这个包,我使用的是 PDM 这个包管理工具
❯ pdm venv create
❯ pdm init
❯ pdm add git+https://github.com/jnsougata/discohook
❯ pdm add requests
至此,开发环境准备完毕。
功能开发
在 discohook 仓库中给出的示例代码有一个简单的
help 指令的实现import discohook APPLICATION_ID = <YOUR_APPLICATION_ID> APPLICATION_TOKEN = <YOUR_APPLICATION_TOKEN> APPLICATION_PUBLIC_KEY = <YOUR_APPLICATION_PUBLIC_KEY> app = discohook.Client( application_id=APPLICATION_ID, token=APPLICATION_TOKEN, public_key=APPLICATION_PUBLIC_KEY ) @app.command( id="", # leave empty for now name="help", description="basic help command for the bot" ) async def help_command(interaction: discohook.Interaction): await interaction.response( "Hello, World!", embed=discohook.Embed(title="Help", description="This is a help command"), ephemeral=True, )
在项目目录中创建一个
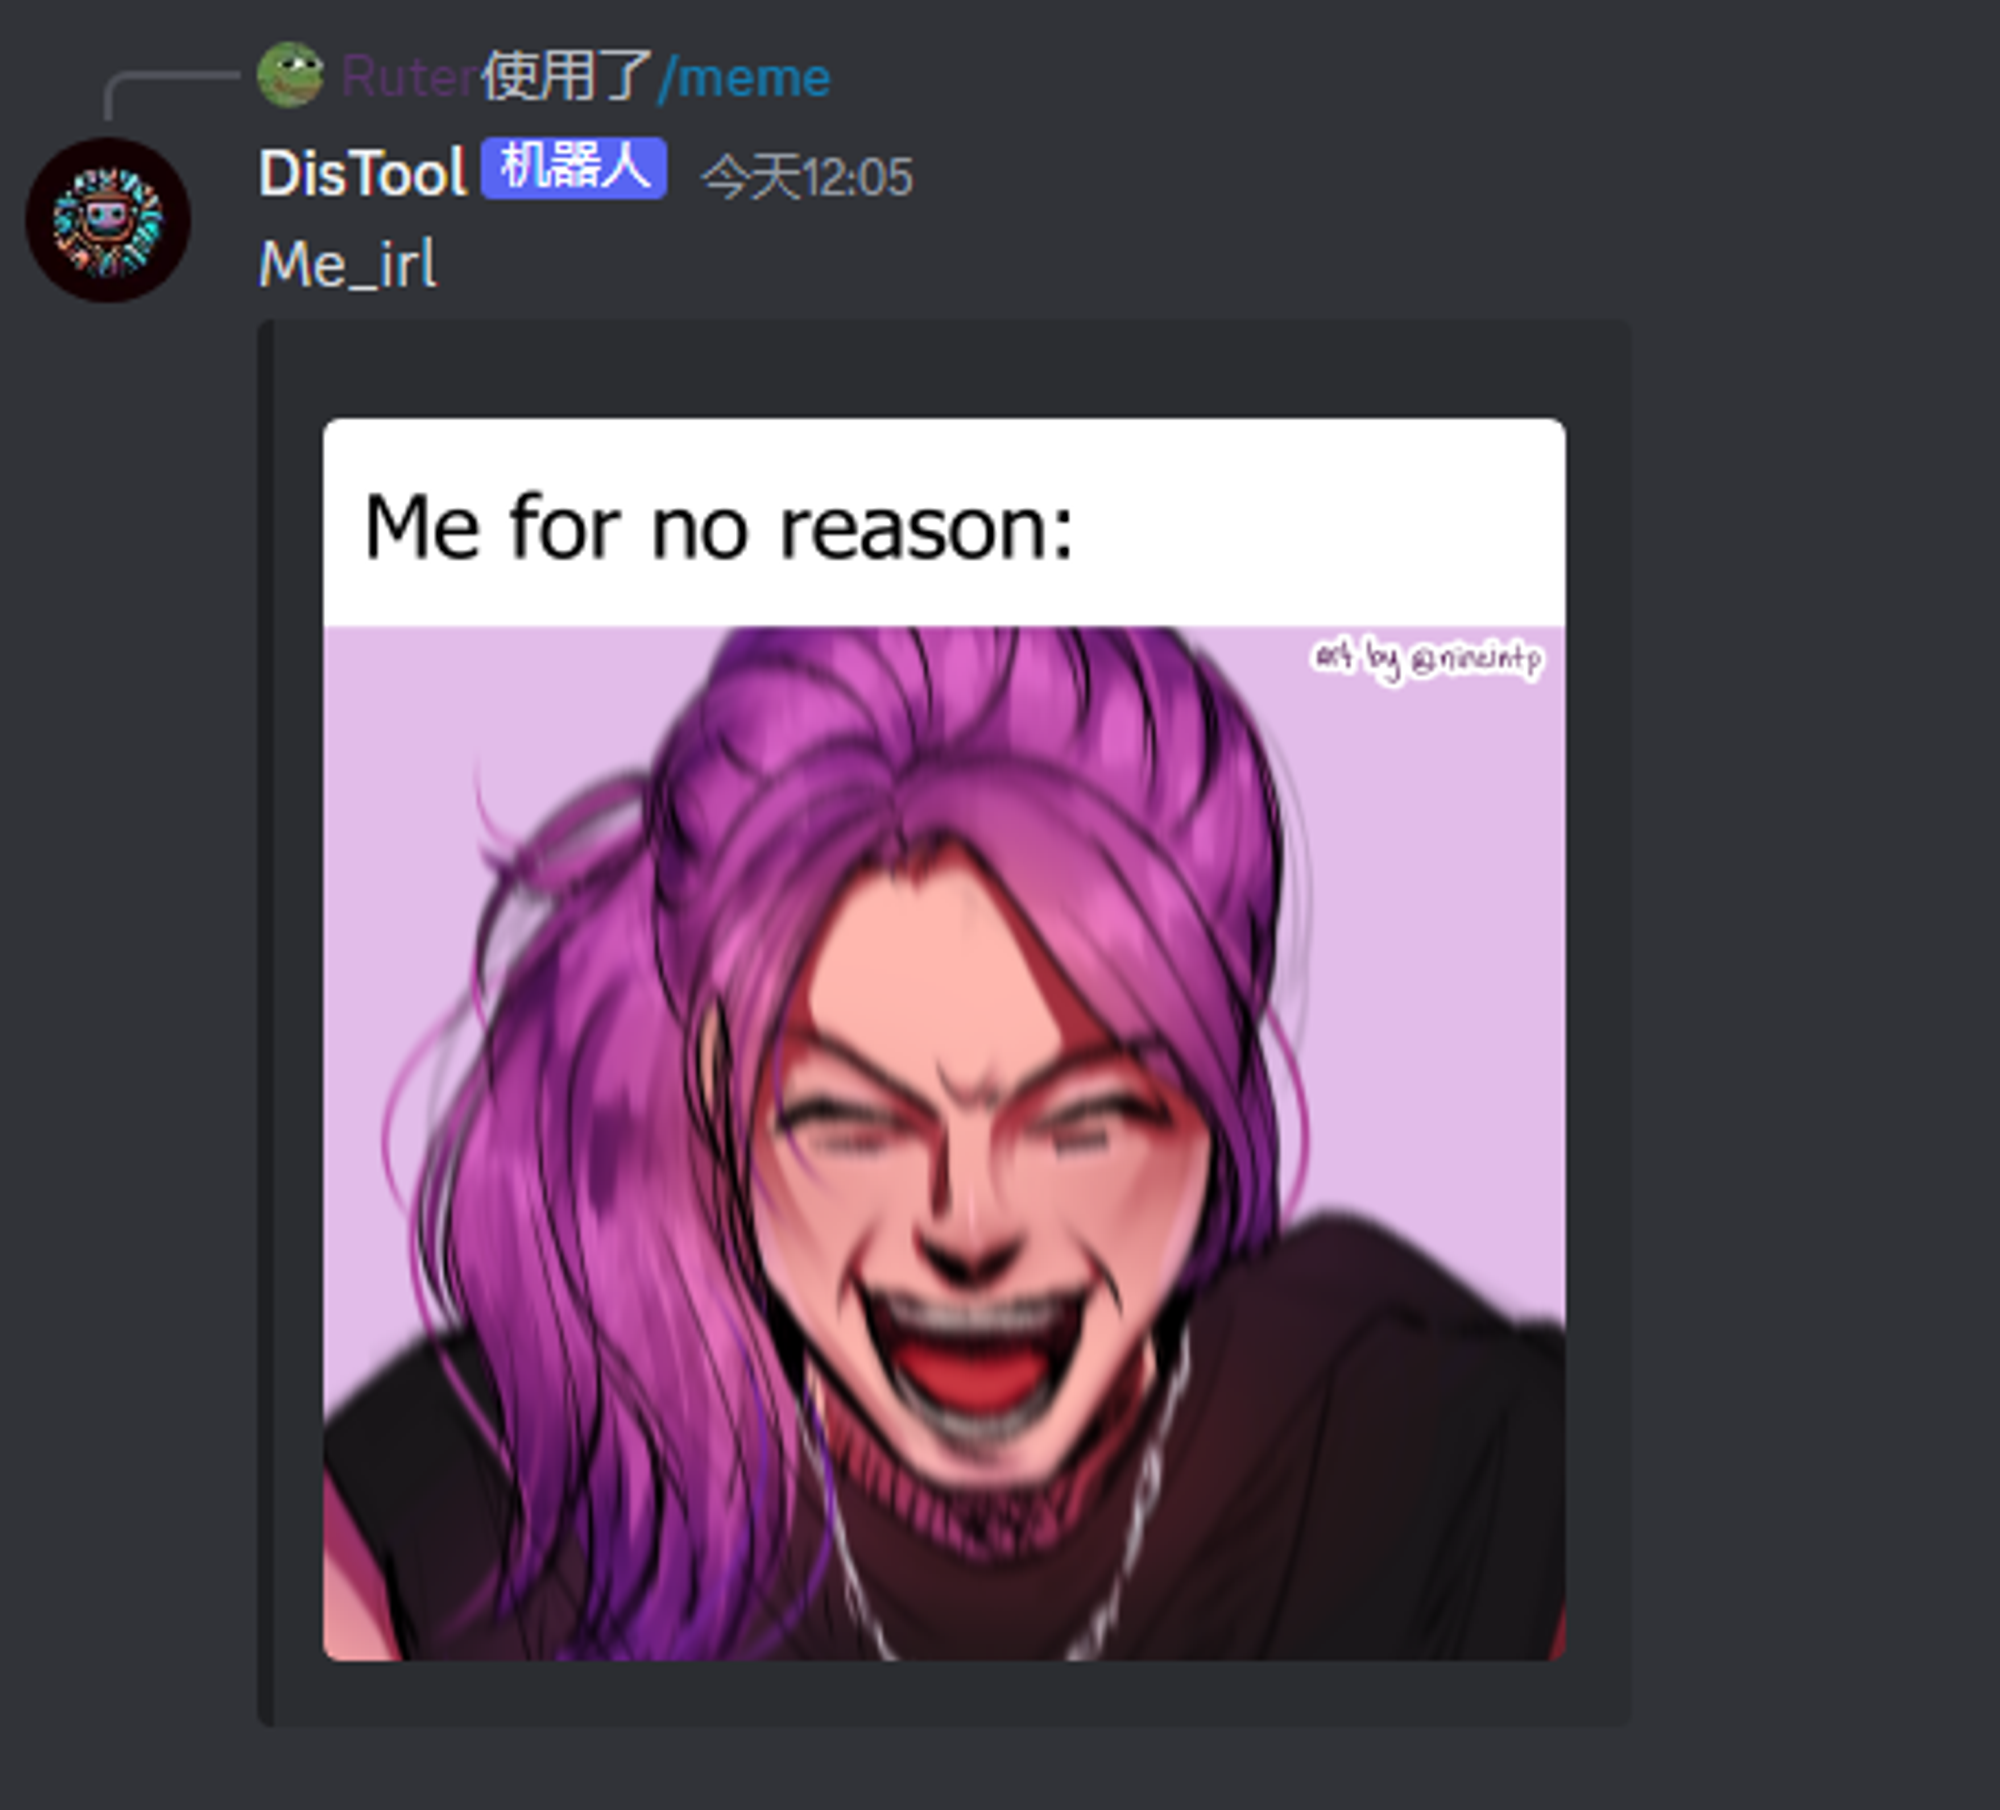
main.py 文件,把上面的代码拷贝进去,然后再做一些修改,把 Discord Bot 需要的 Token 等以环境变量的形式读取出来使用,然后再添加一个随机获取 meme 的命令import os import discohook import requests APPLICATION_ID = os.environ.get('APPLICATION_ID') APPLICATION_TOKEN = os.environ.get('APPLICATION_TOKEN') APPLICATION_PUBLIC_KEY = os.environ.get('APPLICATION_PUBLIC_KEY') app = discohook.Client( application_id=APPLICATION_ID, token=APPLICATION_TOKEN, public_key=APPLICATION_PUBLIC_KEY ) @app.command( id="", name="help", description="basic help command for the bot" ) async def help_command(interaction: discohook.Interaction): await interaction.response( "Hello, World!", embed=discohook.Embed(title="Help", description="This is a help command"), ephemeral=True, ) @app.command( id="", name="meme", description="Send a random meme." ) async def meme(interaction: discohook.Interaction): resp = requests.get('https://meme-api.com/gimme') data = resp.json() meme_embed = discohook.Embed() meme_embed.image(data.get('url')) await interaction.response( data.get('title'), embed=meme_embed, )
就这样,这个 Bot 就有两个可使用的命令了,不过距离真正可使用,还差一步,就是要先启动应用获取命令的 ID,把装饰器中的
id 补全,这样做的具体原因可以看仓库的这一段说明。部署应用
在创建 Discord APP 和 Bot 以及获取命令 ID 前,需要先把应用部署到 Deta Space 上,然后获取应用的 URL 地址才能继续。
在部署前需要先在 Spacefile 中配置好应用的一些基础信息,更详细的说明可以参考官方文档
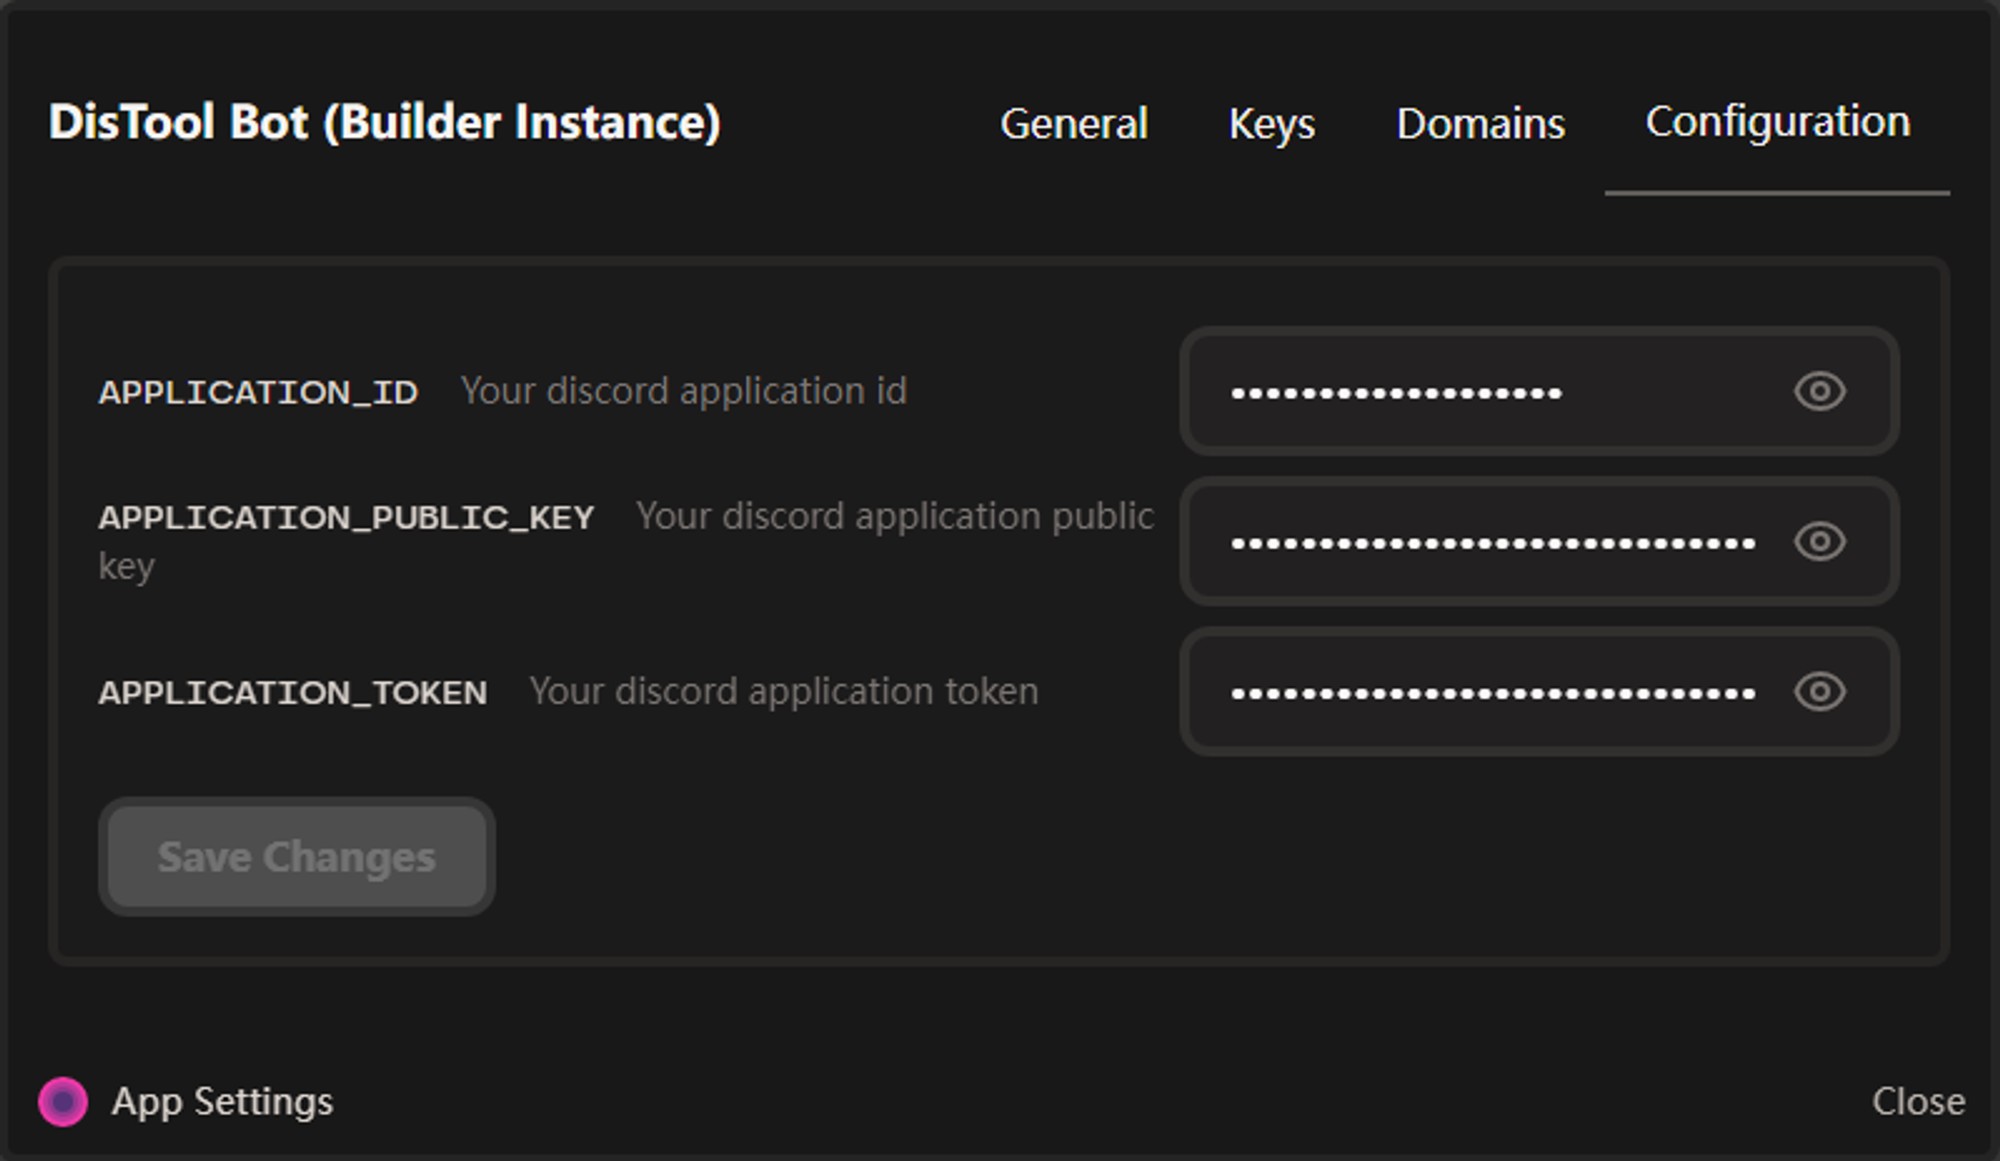
v: 0
icon: ./icon.png
app_name: "DisTool Bot"
micros:
  - name: discord-bot
    src: .
    engine: python3.8
    presets:
      env:
        - name: APPLICATION_ID
          description: Your discord application id
        - name: APPLICATION_TOKEN
          description: Your discord application token
        - name: APPLICATION_PUBLIC_KEY
          description: Your discord application public key
    public_routes:
      - "/interactions"
通过
presets.env 预设了运行 Discord Bot 需要的三个环境变量,应用部署后可以在 Deta Space 应用设置界面中进行配置,然后将路径 /interactions 配置成公开的路由,Bot 可以直接通过这个路径进行交互。配置完毕后还需要把依赖导出到
requirements.txt 中,在部署时才会被安装❯ pdm list --freeze -v > requirements.txt
完成上面的工作之后,就可以部署应用到 Deta Space 上了
❯ space push
...
✓ Successfully pushed your code and updated your Builder instance!
Run space release to create a release that others can install.

Builder instance: https://xxxxxx.deta.app
部署成功后会看到一个实例的地址,这就是部署成功后的应用地址,剩下的就是跟着这里的说明一步步进行操作,获取到需要的三个环境变量,在 https://deta.space/ 中打开应用的设置界面,将对应的值填入保存即可。
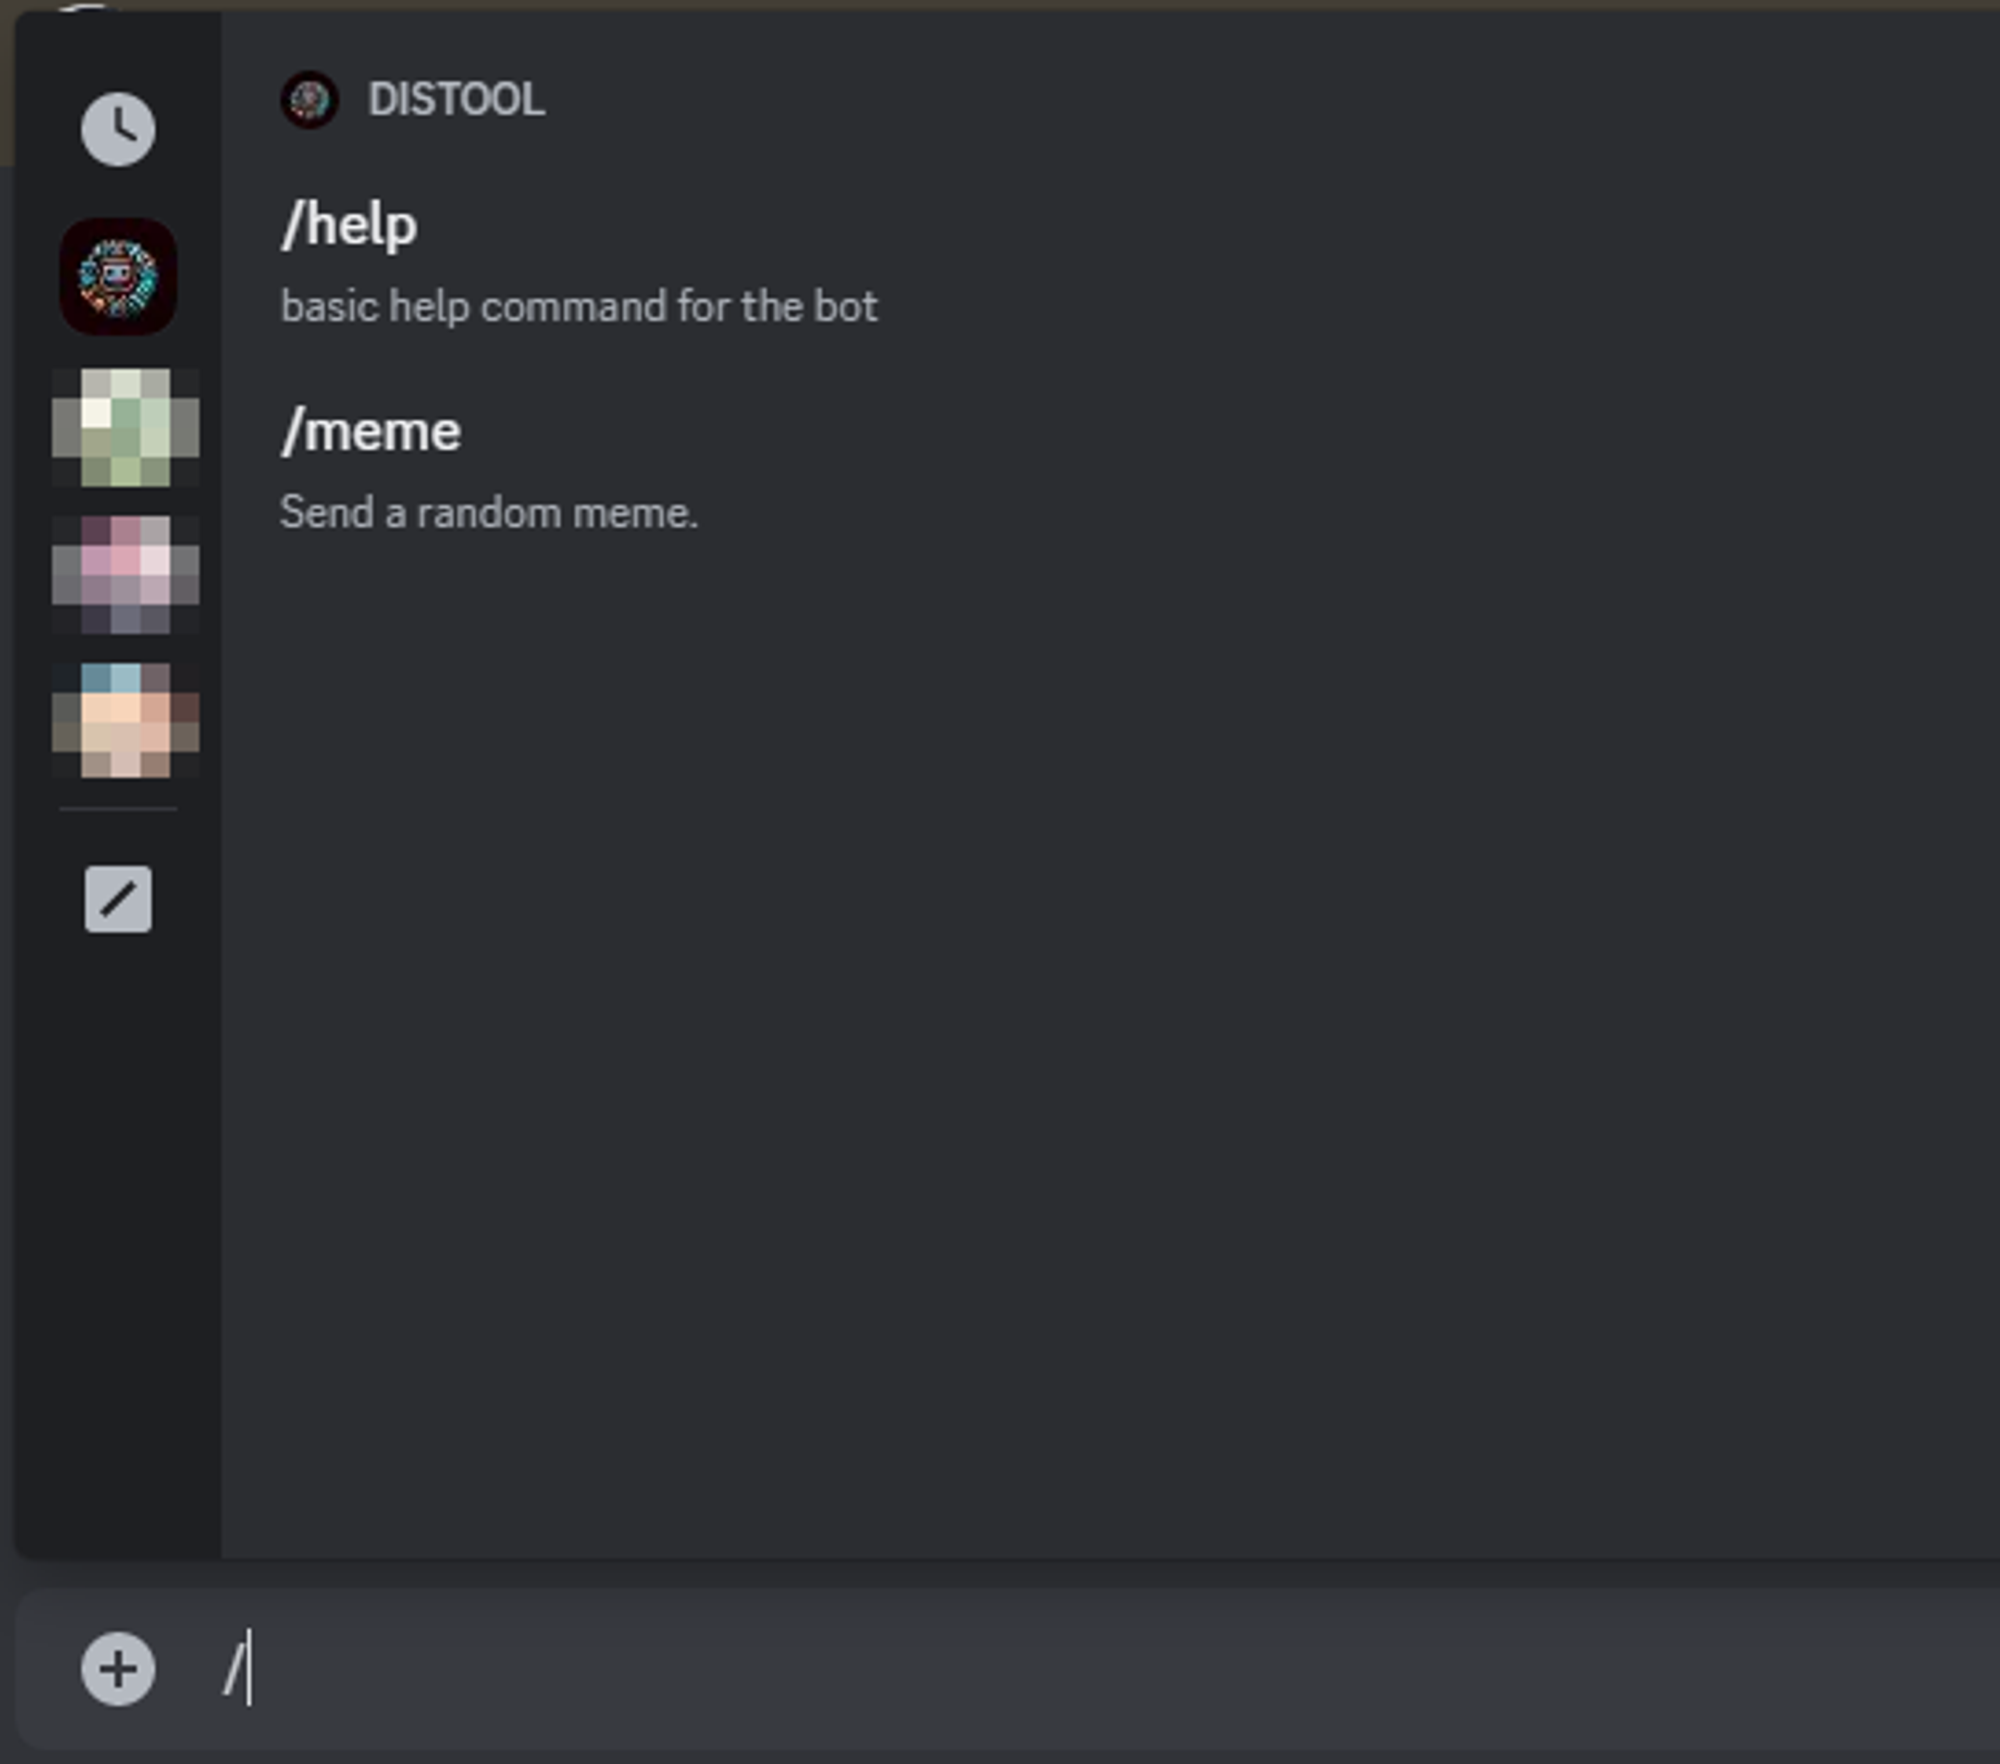
最后要做的就是访问
https://xxxxxx.deta.app/dh/dash/<bot_token_here> 打开控制台,复制各个命令的 ID 分别添加到对应命令装饰器的 id 中,然后再次执行 space push 重新部署即可。添加 Bot
打开下面的链接(替换
client_id 为前面获取到的 APPLICATION_ID)后,即可邀请创建的 Bot 到频道中,然后在任意频道聊天框中输入 / 即可进行交互https://discord.com/api/oauth2/authorize?client_id=<APPLICATION_ID>&permissions=274877959168&scope=bot
链接


本文采用 CC BY-NC-ND 4.0 许可协议。转载或引用时请遵守协议内容!